
This is the mirror frame I made during the Skills Olympics competition at RTC, I intend to finish it and add in a mirror. Hopefully I can make it match the fruit crate I have at home which is also done in cherry, and was the very first project I did at school.
 |
| The fruit crate, with future banana bread. |
Dec 16th 2015
Today I began sanding my mirror frame to prepare it for a Danish Oil finish. I began by going over the joinery with lacquer thinner to reveal any glue spots that may be present, but invisible to the naked eye.

Of course, since I'm a novice woodworker, there were quite a few. I noted problem spots with my pencil (since the lacquer thinner dries quickly and the defects are hidden again), and then got to work on them with my cabinet scraper and chisels. After checking again with lacquer thinner that all traces of glue were gone, I moved to the downdraft table and began my sanding at 80 grit. This turned out to be a lot of work, since this project has all sorts of odd shapes, tight corners and spots where two pieces meet and the grains run perpendicular to one another. Furthermore, very little of the surface was appropriate for using the orbital sander on. Tomorrow I will have to touch up my 80 grit sanding to get any little spots I may have missed, then I can move on to 120 and then 150.
Dec 17th 2015
I started the day by working on some coasters I had made in marquetry. To check for glue before sanding them, I wiped the pieces with methanol, which Brendan said is a bit less harsh on marquetry than lacquer thinner. I labelled my bottle of methanol, though by the end of the day it was already fading.
 |
| Poor label. |
After sanding my pieces to 120 to remove the scratches and veneer tape residue, it was time to spray on lacquer. After Brendan showed me how the spray gun works, I sprayed three coats on the tops and bottoms, while making sure to also spray the very thin sides to seal the bare plywood. Tomorrow I can give them a scuff sand followed by a final coat of sprayed clear lacquer, and then wipe on some wax for a great shine. Easy Christmas presents, ready to go!
 |
| Such gloss. Much shine. |
Since those should be dried completely before scuff sanding, I set those aside to work on my marquetry goose panel from the exam. I sanded 80 then 120, then I did two layers of tung oil with wet sanding, 220 grit followed by 320.
 |
| *Hwaaanh haaannnh!* |
I also have frame for it made of poplar that I threw together pretty quickly, and after sanding the pieces of that to 220, I wiped on a layer of concentrated white.
The white didn't leave a very noticeable colour, so I'll be trying a tinted glaze tomorrow after gluing up the frame.
 |
| Just sanded on the left, tinted on the right. A very subtle difference. |
Dec 18th 2015
I started today by scuff sanding (320) the coasters I'd lacquered yesterday until they felt smooth all over, The white in the cracks on the oak leaf coaster is lacquer dust that is caught in the cracks between the veneer where the lacquer settled deeper. It would have been ideal to make this gap more even during the marquetry, or possibly filled that space with a matching putty. During the scuff sanding I was running my fingers over the piece a lot to feel that I'd made them smooth, since sanding beyond that point is just removing lacquer I want to keep.

With that done, it was time to apply my final coat of lacquer. I followed this by scuff sanding it once more (at 400) and rubbing wax into the tops and sides of each coaster. I didn't bother with the bottoms, since they aren't going to be seen very often.

 |
| The coaster on the left had dried wax on it, and the one on the right has been buffed. Buff it up! |
I also wanted to finish my goose panel and frame today, since it's a gift for my bird-watching uncle. I did another two layers of tung oil and sanding (400 and 600 grit), and glued up the frame and panel. After sanding a spot that I'd missed originally and then reapplying the white wash on the frame, I taped over the panel since I wanted to spray just the frame, not my marquetry. I'd originally cut my paper to fit the square very closely, but then there was nothing for the tape to stick down to. I ended up going with a square that's somewhat smaller, and I taped it down before putting the more precise edge tape since the paper kept moving on me.

With the panel protected on both sides, I sprayed a sealing coat of lacquer to preserve the white wash. After scuff sanding that lacquer (320), I mixed together a few different concentrates with some clear glaze. I wanted to try a couple of different colour ideas, so I used the back of my frame as a testing area since it'll be against the wall. I tried walnut, cognac, and plain brown, and the walnut glaze ended up being my favourite look (though it didn't end up looking much like walnut).

A video of scuff sanding. You need to feel the piece
a lot to check if it's smooth, and stop sanding
that area once it is.
This glaze needed a layer of protective lacquer, so after it dried I made my way into the spray booth.
Once that lacquer was dry, I waxed my frame following the same procedure as with the coasters. Finally it was the big moment, time to take off the news paper and check if any glaze made it onto my goose, and see how well the frame stain matched the marquetry.
 |
| This isn't even my final form. |
Success! I wanted the piece to have a rustic, country-house look, since I suspect my uncle will hang it up at his cottage. The frame has a nice weathered look to it, though I assure you it's well protected. I can even re-oil the goose panel as needed over time, since the lacquer will prevent the oil from touching the frame and affecting the stain. What a transformation from the original poplar colour!
Jan 4th 2016
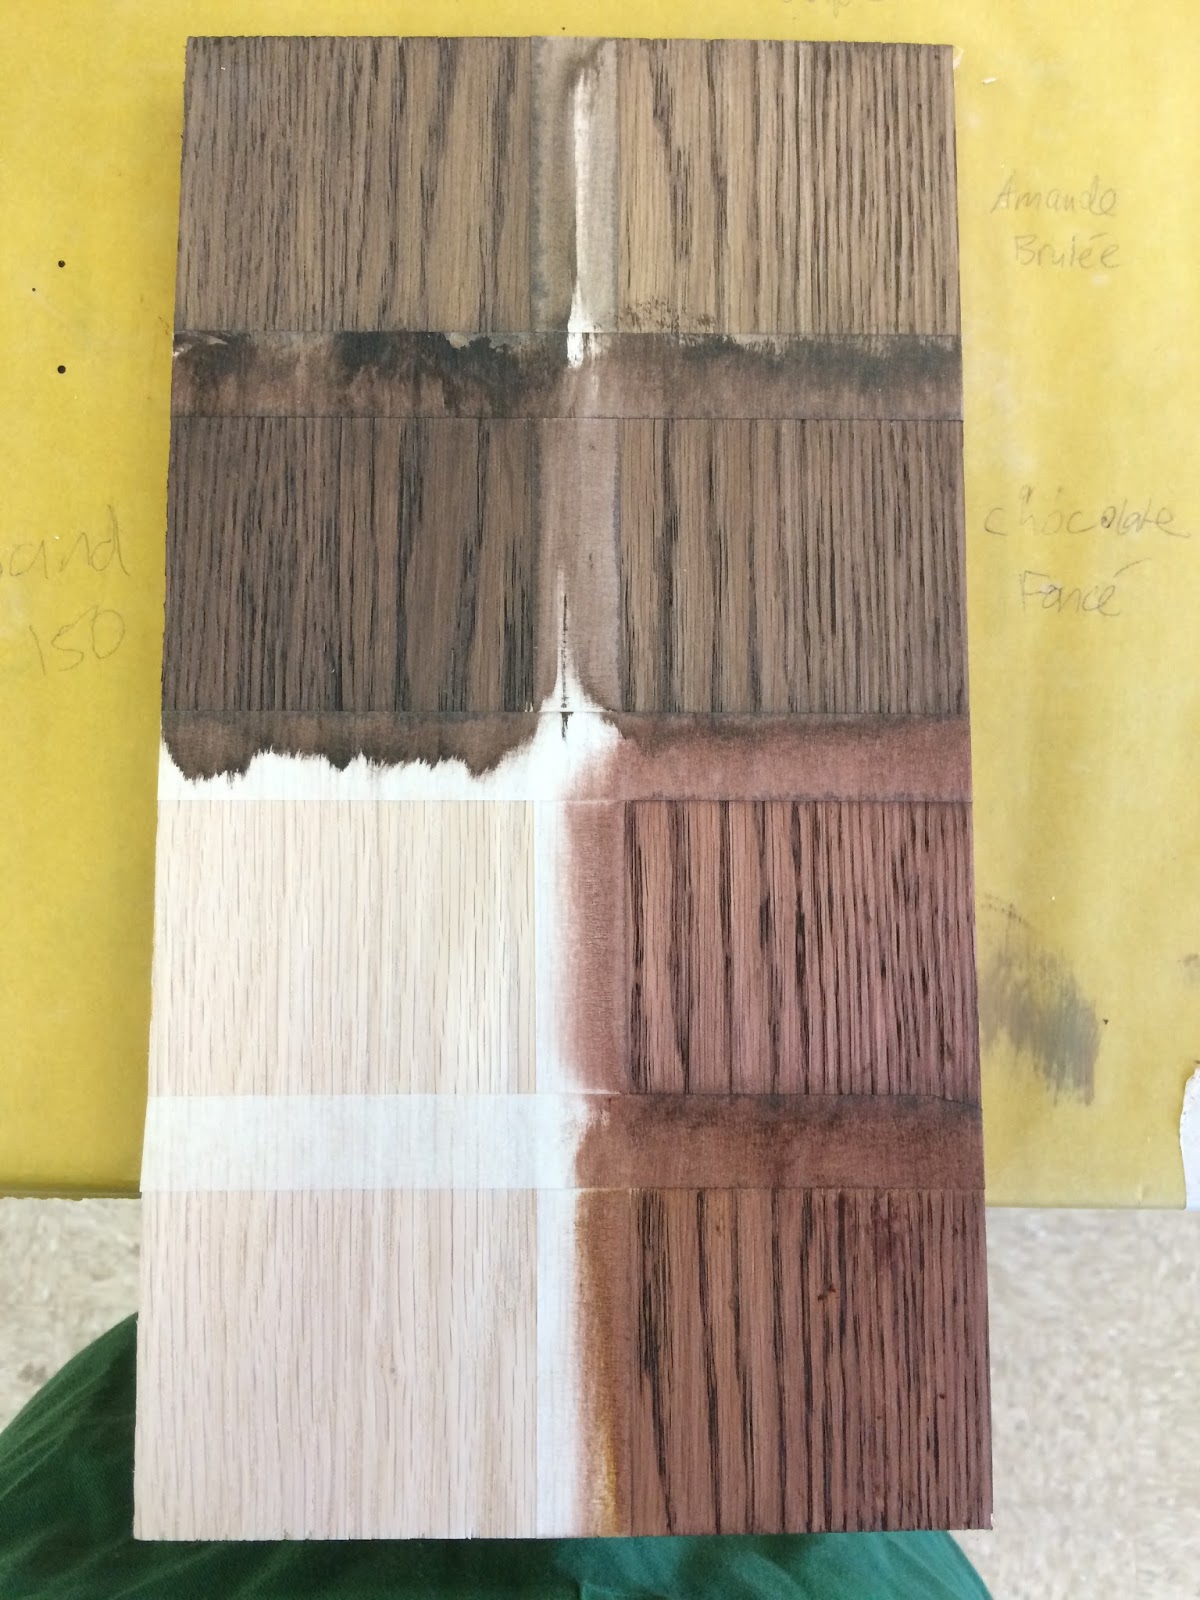
Today we reviewed most of what we'd learned before the holidays, and we covered spraying lacquer and proper spray gun maintenance. After lunch, I began making sample boards for my red oak leg and rail, since I'm eager to do some staining and since it's half sanded from the module where we built it, I can get right into it. At first, I tried out some primary colour concentrated dyes, and I wiped some lighter brown stains over them. Unfortunately, this didn't give a very attractive look at all. I suspect the concentrated dyes go better under a somewhat darker stain. The left column had Tea stain, the middle column was Inca Brown, and the rightmost column was Tortilla.
 |
| Bleh. |
 |
| Bottom left squares unfinished due to laziness. |
The top of my table is a chessboard made of oak and walnut veneers, so I was experimenting to find a stain which would darken and enrich those woods while maintaining a contrast between the two. I tried (left to right) Tortilla, Inca, Cerisier, and Tea, Though I love the way Cerisier made the walnut look, it really muddled the oak, which isn't great, Both Inca and Tea seemed almost like paint, and they definitely hid the grain of both woods. I'll be going with Tortilla stain, since it adds just a hint of darkness to both woods while maintaining the contrast I want. Both veneers will have a look not so different from the unfinished woods, which I'm happy with.
Cherry and Walnut are traditionally woods that compliment each other in American woodworking.
 |
| The Inca stain looks like milk chocolate. |
Jan 5th 2016
I started off today by cleaning up my leg and rail to prepare for staining. Sadly, as I was sanding the tabletop, the veneer around the edges was damaged, so I'll be trying to repair it during the next module. (Module 23 Furniture Repair and Restoration) I still went ahead with working on the leg and rail, starting with some sanding and cleaning off tape residue with methanol.

As per my story board plan, I wiped the table with concentrated yellow, and then applied the Tudor Brown stain by hand.

Since the resulting colour seemed a bit dull, I chose to spray on orange NGR toner to play with the colour a bit more.
After three coats of lacquer with scuff sanding in between, I applied wax and buffed it, and here we are!

 |
| As you can see, the table rail (bottom) is a good match to my sample board (top) |

Jan 6th 2015
Today I finally got back to working on my mirror frame from the skills olympics. I had planned to oil it to have it match my fruit crate at home, but instead I went with lacquer since it's quicker to apply, more durable, and pretty similar in appearance to oil. I sanded 120-150-220 today, then applied three coats of lacquer with scuff sanding in between. The area around the shelf was a real headache to sand because of all the small nooks and perpendicular grains! I finished the frame by waxing and buffing it, and the final colour is quite lovely.
 |
| Sunshine shot! |
Jan 7th 2015
Today I began sanding my nightstand, since I'd made sample boards for it yesterday and I was eager to start. As I suspected it would, it took me until a bit after lunch to get all the sanding done. WIth that out of the way, I needed to tape up the three openings in my cabinet (top, drawer, and door) so that I wouldn't end up with a big mess of overspray on the inside of the cabinet. I am choosing to leave the inside unfinished,

After taping up the openings with newspaper and a whole lot of tape, I wiped on black concentrated stain as my base colour, and I applied a first coat of lacquer. To be continued tomorrow!

BOOTIFUL GOOSE!!!!! :D:D:D:D:D:D:D:DD:D:D:D:D:D:
ReplyDeleteGreat job!
ReplyDelete..and talent, filming while spraying at the same time. :)
Good job Colour matching
ReplyDelete